The objective of injection molding is to produce identical moldings at the specified quality each and every time. Repeatability is the key: setup, process, inspection, repeat.
There are seven basic steps to the setup of injection molding:
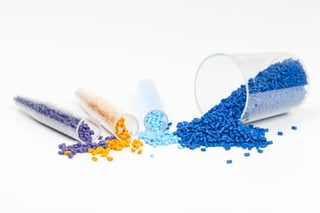
Properly prepare the raw material
Safely position the tool into the machine.
Securely fasten the tool onto the platens.
Connect cool, hydraulics, etc. and set the parameters as listed on the setup sheet.
Install/setup all auxiliaries.
Double check to insure the job is 100% ready for production.
It is important to know that before starting any job change over, have all your tools that you will need ready: roll-a-round cart with hoses, nipples, fittings, clamps, bolts, hand tools, stones and emery paper for any burrs, and anything else you could possibly need. There should be no wasted time searching for all you need.
 You must properly end the previous job by:
- Updating all paperwork
- Completing a mold storage/repair form
- Labeling and retaining one or more last shots
- Cleaning the mold and neutralizing when required
- Coating the exposed steel with rust preventative
- Removing the coolant from the mold cooling channels
- Removing the mold per the procedure for that mold
(Some molds have unique features which require special handling when installing or removing.)
To prepare the machine, stone, scrape, and/or wipe both platens clean, check the tie bars and wear plates, make sure the lifting device has enough capacity for the tool, assure that the tie bar clearance is sufficient, place KO (Knock Out) bars into the proper position in the moving platen, clean both clamping plates, check locating ring for damage, and assure that the tool is production ready.
When lifting and handling, you will want to have an a-frame, overhead crane, fork lift, mold table, chain fall, and lifting straps for your safety, your mold’s safety, and your machine’s safety as safety is top priority.
For the final clamping, close the platen at a low pressure and speed watching the mold and locating ring at all times for any possible problems, mold clamps on and tightened parallel to the platen. Bolts should be threaded into the platens for a minimum 1 ½ times the diameter of the bolt. When you disconnect the lifting device, get it out of your way.
The next step is to set the clamp and KO stroke as short as possible with the minimum cycle time. Clamp the open stroke twice the core length, enough to ensure parts and runners clear mold. Clamp and low pressure close and use one KO count when possible because any more wastes time and increases tool and machine wear.
Ensure that your cooling line hoses are:
- In good condition and properly rated
- Connectors are in good shape with no burrs or dents and washers are present and in good condition
- Installed for maximum efficiency with absolutely no loops
- Cooling lines are tied off with no interference with machine or mold movement
- Per diagram for consistency from run to run
- Color coded


